Friday, March 23, 2012

Glitter-bomb: tutus for trucks

Ok, so you saw the last post about the cute shirts I made for the boys and older girls to wear to Monster Jam when it was in our hometown, but I made something extra crazy special for the little girls. 

Little girls (and some of us older girls) love sparkles, but after this great idea I had, I've had my fill of glitter from while. 

I made the little girls tutus... out of tulle coated in glitter. 


When I saw this sparkly goodness in the store, I just knew the little girls would love it.


So I bought enough to make four lovely tutus.


And in making them, I have permanently coated one end of our couch and a large part of our living room carpet in silver and orange sparkles. 

You're welcome, Hubs. :)

Here's one of the little angels blowing kisses - not sure if she's blowing them at the trucks or if Uncle Awesome was on the big screen... either way, she was pretty cute in her Maximum Destruction tutu. 


After having a few tutu-clad gals running around our seats and crawling all over us, we all had enough glitter all over us that we could've gone out and stood on the corner and fit in with the workin' girls, ifyaknowwhatimean.  There was so much glitter on the floor in front of our seats that it was actually slick to try to walk on. (The poor, unfortunate folks sitting in the row in front of us had glitter all over their backs...whoops... hope none of them were married men that had to answer to their wives when they got home as to why they had glitter all over their back!  HA!)


But here's the group of kiddos in their cute gear after the show.  All of the kiddos did a great job and everyone had a lot of fun. It was a great show. 

I don't think anyone cried or had a meltdown... other than me... in the car... when it was time to leave them all.  I just can't help but love 'em! :)

Friday, March 16, 2012

Making t-shirts for some truck-lovin' kiddos

I have some pretty outstanding nieces and nephews. 

They have a way of really making my heart melt with their sweetness. 

Most of them think their uncle (the one I'm married to) is pretty awesome, and I think it's pretty awesome that they thing he's Uncle Awesome. 

And when Monster Jam is coming to their town, they think he's neater than sliced bread (do people still say that? Have little kids ever said that? I don't know...) 

But the point I'm making is that these are some monster truck lovin' kids... especially Maximum Destruction since that's who their Uncle Awesome works for. 

And, because I want to be their favorite aunt wanted them to have something special for this year's Monster Jam and because I tend to be distracted by shiny things, I decided I was going to make the boys and two older girls t-shirts to wear at the show, and the smallest of them all would be getting a hand crafted onesie. (I made something different for the four younger girls, but that'll have to wait for another post... I still haven't recovered from all the glitter)

That's an order for four boy t-shirts, two girly t-shirts and one adorable onesie. 

I started with the girls' shirts

I used my little Cricut to cut the words out of freezer paper and peeled out the letters and kept the negative space to use as a stencil, along with the middle of the o's and a's.

I ironed on my handy-dandy stencils and used some Tulip glue-for-tshirts-stuff and then sprinkled it with gold glitter.  And then I let it dry for many, many hours. (but the directions only said two hours - that was my bad.)

For the boys' shirts, I made stencils the same way and used some silver fabric paint to fill them in, and then I repeated the painting, and then I put on another coat, and then I put on another coat (seriously, like four coats of the stuff!)

Here's the finished product of the older girls' shirts (I secretly LOVE them and was really tempted to make one for myself, but thought that might be a bit too "crazy-craft-lady")

For the little guy, I made two onesies, but only because I put a hole in the first one trying to peel off the stencil (turns out if you use old-school puff paint and let it dry, the stencil won't come off. And then, if you try to peel if off using your brute-force, you just might end up ripping it.  Oh well, guess that's why plain white onesies are sold in packets of three!) But for the onesie that turned out, I used the old-school puff paint and then PEELED OFF THE STENCIL BEFORE IT DRIED! See, I do learn from my mistakes.)

And he loved it :)

And they loved them :)
The older girls loved theirs too, but I didn't get a picture of just them, so you'll have to stay tuned.

(but for reals, yo, don't I have some of the most adorable nephews you ever did see? Yeah, I think so, too)

Tuesday, March 13, 2012

The never ending hallway

Hi readers!

'Member me? The chick that writes this blog on a no-way-regular-or-planned-or-even-slighty-scheduled manner?

Yeah, that's me.

I figure you've either written me off or forgotten about me, so I reckon I'm writing this for a whole 'lotta no one.

Hi, no one.

Have you ever had a dream that you're walking down a hallway and you never come to the end of it?

I have. In my dreams, it kinda looks like this...


Oh wait, that's my for real hallway.

And it's not that long... but it is never ending, in a less-than-philosophical way.

And no, I haven't gotten started on my laundry room.  I got sidetracked by the hallway.

I start painting it... I painted all the grey and half of the white trim....

And then I ran out of painter's tape.  You know, the blue stuff that keeps the white paint on the trim and not all over the walls.

And then I ate a meal.... and then I slept... we all slept... for many moons


But then I found another project I wanted to do and I MADE myself finish the painting before I started anything else.

And now, the hallway is done!

(Please note: by "done" I mean that the painting is done and the blue tape is removed, but the wall register is not painted or replaced and the photos are not hung up.)

Now, on to our regularly scheduled laundry room redo...eventually

Friday, January 6, 2012

The next house project


Up next on the house re-do to-do list will be the laundry room.  

She ain't big, and she ain't beautiful (yet!), but I already love her.  In our old house, the laundry was in the corner of the basement.  It was nice because I could spread out, but it was a basement and there were occasionally spiders in our dirty clothes and that, for many reasons, creeps me out!


So here is my new hardest-working-room in the house.


It's pretty basic at this point - washer, dryer, baskets and dog feeding/drinking area.


I love the hooks on the wall.... don't love the color.  That will be going.  The pantry is just to the right (outside of the picture.)

But before I begin this project, what do you have in your laundry room that you love? 

What's in your laundry room that you hate?  
Mine needs a place for what I call "nasty" clothes... Hubs mechanic-ing clothes.... think gear oil, tranny fluid, etc. (I hate them... they stink and make my washing machine nasty)

Any wonderful suggestions that I simply MUST include?

Clue me in here, folks... let me learn from your mistakes and what you love!

mmmkkkkkkaaayyyy?  

Thanks! (and I will, of course, let you know how it goes)  

Friday, December 30, 2011

Going grey with grace

Once Hubs and I moved into our new place and some of the "new" wore off, we got to thinking about just where we were going to start to make this place our own.  


The day we looked at the house, the master bedroom looked like this. A lot of furniture, bed up against the wall and not much free space.  

And, while I thought that we should start the renovating with the main living spaces (such as the living room, dining room, kitchen), Hubs was pretty steadfast that we start in our bedroom.  And let me tell you, it's the best idea (other than marrying me) the man has ever had! 

So, over a lunch break one day, I picked the color for our bedroom.  While that is not something I highly recommend or typically do (I am much more of a "let me sleep on it" style decision maker), it worked out great! 

It's a really soft grey. The color is from True Value and is named Stunning Maiden. 


We painted the walls grey and the trim white.  I am a lover of white trim.  

Two things I want to point out:

We went to Best Buy and bought two new TVs (one for living room and one for bedroom)  The TVs we had were old and were big, heavy tube TVs.  (The poor kid at BB looked at us like we were ancient when we told him that.  Then he looked at us like we were really crazy when we played, rock, paper, scissors in the middle of the store to decide which ones to buy.... we're adults and we make decisions like children.  So what?)
But we knew we wanted to hang the bedroom TV and we wanted it to swivel up completely against the wall.  But what's so cool is the way Hubs ran the cords.... behind the wall!  I know that's like "duh" but as much as I HATE cords being exposed, I was really not thrilled about TWO cords hanging from the TV.  This is one more reason I LOVE HIM!


Number Two Thing I Wanted To Point Out:

I bought this picture at a fancy schmancy decorating store, which is usually only a place I go to look for ideas of things I can hack, but once I saw it, I had.to.have.it.  


And here's why: 

 It was the first thing I bought for our new house and I love it. 
  

I'm still looking for something for the big wall in our room and I still need to paint the doors.  However, lemme tell you, I LOVE that this room is "done." After stumbling over boxes and paint cans and tools and "stuff" all over the rest of the house while we were working on it, I love that we can come in here, shut the door and relax.  

I tell you what...that man of mine... he's a thinker... and a keeper!

I loved the grey color so much, I used it in other parts of the house, too, but you'll have to wait to see that in another post! 


Friday, December 23, 2011

My Village... updated!

Remember last Christmas when I posted about my awesome Snow Village?  (If not, I won't hold it against you... the post is here.)

After posting the pics of my village, I got a note from one of my friends that said, "I didn't know you were one of those crazy village people!" 

I don't traditionally think of myself as crazy, but in this instance, the label might apply.  :)

I have new pieces to add this year and, because this blog is more of a place to virtually "keep" things, I wanted to share!

This is a grainery, or what would today be an elevator.  And with my job switch, it seemed pretty appropriate.  We added the tractors :)

This gazebo came with ....

...this lighted tree.  Hubs got me these last year because they are part of the set that goes with....

... this inn!  And how fun are the people that came with it that are checking in at the inn?

It's technically named that Eden Prairie Inn, just fyi.  

Last year, Hubs also got me this sweet little log cabin.

And it came with this little guy and his dog who are out collecting firewood for the cabin. 

My village is just a small part of the way I carry on our family's tradition of Dept. 56 Snow Village.  

Any other village crazies out there?

Merry Christmas!

Sunday, December 18, 2011

By Request: Cheeseburger Soup

So here's what happened...

I posted on Facebook that this seemed like a Cheeseburger Soup kinda day and I had a few people ask for the recipe.... 

....and since I had a blog at one time *wink* I decided to just do a post about my loverly cheeseburger soup.

This is Hub's favorite, or one of them, and it is one of those meals that I only fix on rare occasion.  

If he loves it (and I do too, BTW) why is it a rarity   
Because it takes me a long time to fix it.  Today, it took me two Miranda Lambert albums and one Christmas music album... not kidding, dude.... it takes a while!  

It's not hard to make, but it requires multiple steps and lots of chopping.  I also made a triple batch because if I'm going to go through the work, we're going to eat it for more than one meal. And, in my opinion, it tastes better after the first day, anyway.  It also freezes well.

Without further ado, here's some pics of my soup.  (I'll type out the full recipe at the bottom, so you don't have to take notes throughout the post... just sit back and admire my awesome photography skills)
(that's a joke...about the photography...I didn't work too hard at it)

Step one: brown hamburger, drain and let it sit in the sink

Saute celery, onions and carrots in some butter.

Chop up potatoes

Line up canned ingredients and some more butter and take a picture.
 
 
Add broth, potatoes and beef back to veggie mix.

Think to yourself, "is that too many potatoes?"

In another pan, create a rue with butter and flour.  
(I don't know if that's really how it's spelled, but I that's what I'm going with.) (Also, I will note, I screw up this step every.single.time. I make this recipe.  So I know from experience that whether you do this right, screw it up and add it anyway, or screw it up and don't include it.... the soup's still delicious)

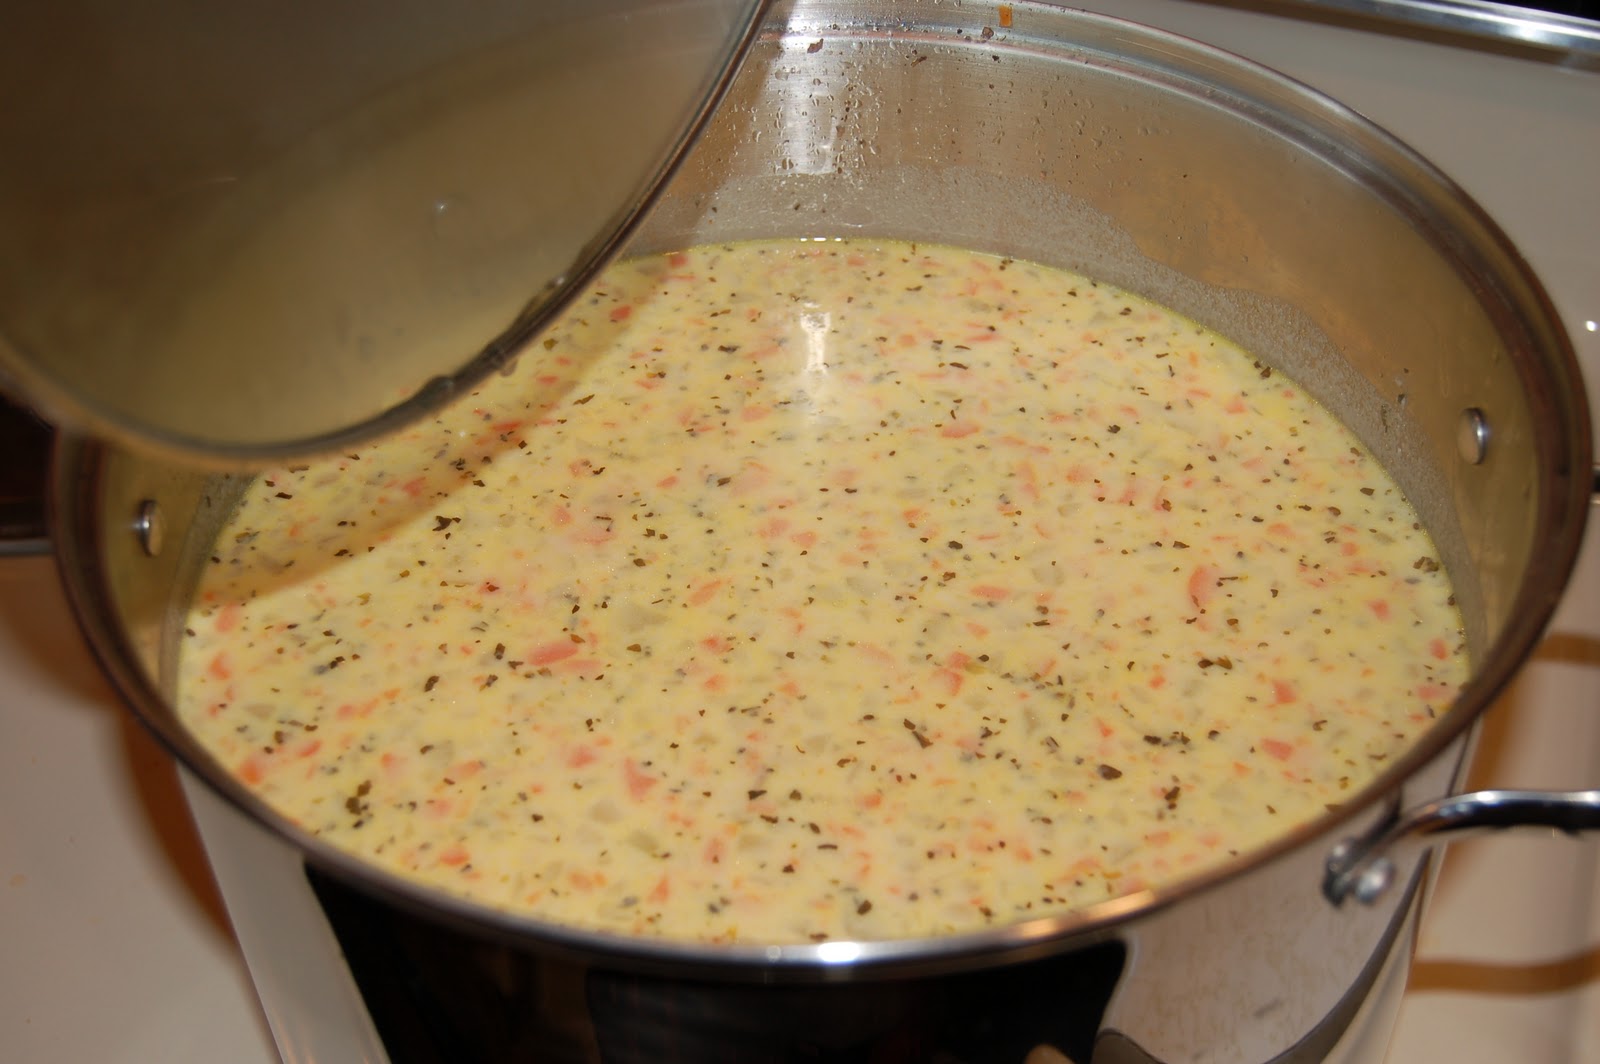
Add cheese and evaporated milk

Let it simmer till you're ready to eat.  

At this house, we eat it with bacon bits sprinkled on the top, but do whatever you like!

This is a recipe my mom found somewhere and she's passed it on to us. Therefore, if someone out there needs credit for creating this, I honest-to-goodness don't know who it is.

So here's the actual recipe: (sorry I didn't put it on printable cards, I missed that day of blogging class and I don't know how to do that.  But you can copy and paste!)

Enjoy!

Cheeseburger Soup:

1/2 lb ground beef
4 T butter or margarine, divided
3/4 cu chopped onion
3/4 cu chopped/shredded carrots
3/4 cu chopped celery
1 tsp dried basil
2 cans (14.5 fl. oz each) chicken broth
4 cups of peeled and diced potatoes
1/4 cup flour
2 cu. cubed Velveeta
1 can (12 fl oz) evaporated milk
3/4/ tsp salt
1/4 to 1/2 tsp black pepper
bacon bits

Cook ground beef in large saucepan over medium heat until brown; drain and set aside.
Melt 1 tablespoon of butter in same saucepan over medium heat.  Add onion, carrots, celery, and basil; cook, stirring occasionally, about 10 minutes.
Add broth, potatoes, and cooked beef; bring to a boil.  Reduce heat to low; cover.  Cook, stirring occasionally, 15-20 minutes or until vegetables are tender.
Melt remaining butter in small saucepan over medium heat.  Sprinkle in flour; cook, stirring constantly, 3 to 5 minutes or until bubbly.  Add to soup; bring to a boil.  Cook, stirring occasionally, 2 minutes.
Reduce heat to low; add cheese, milk, salt and pepper. Stir until cheese is melted.
Garnish bowls with bacon bits, if desired.
Related Posts with Thumbnails